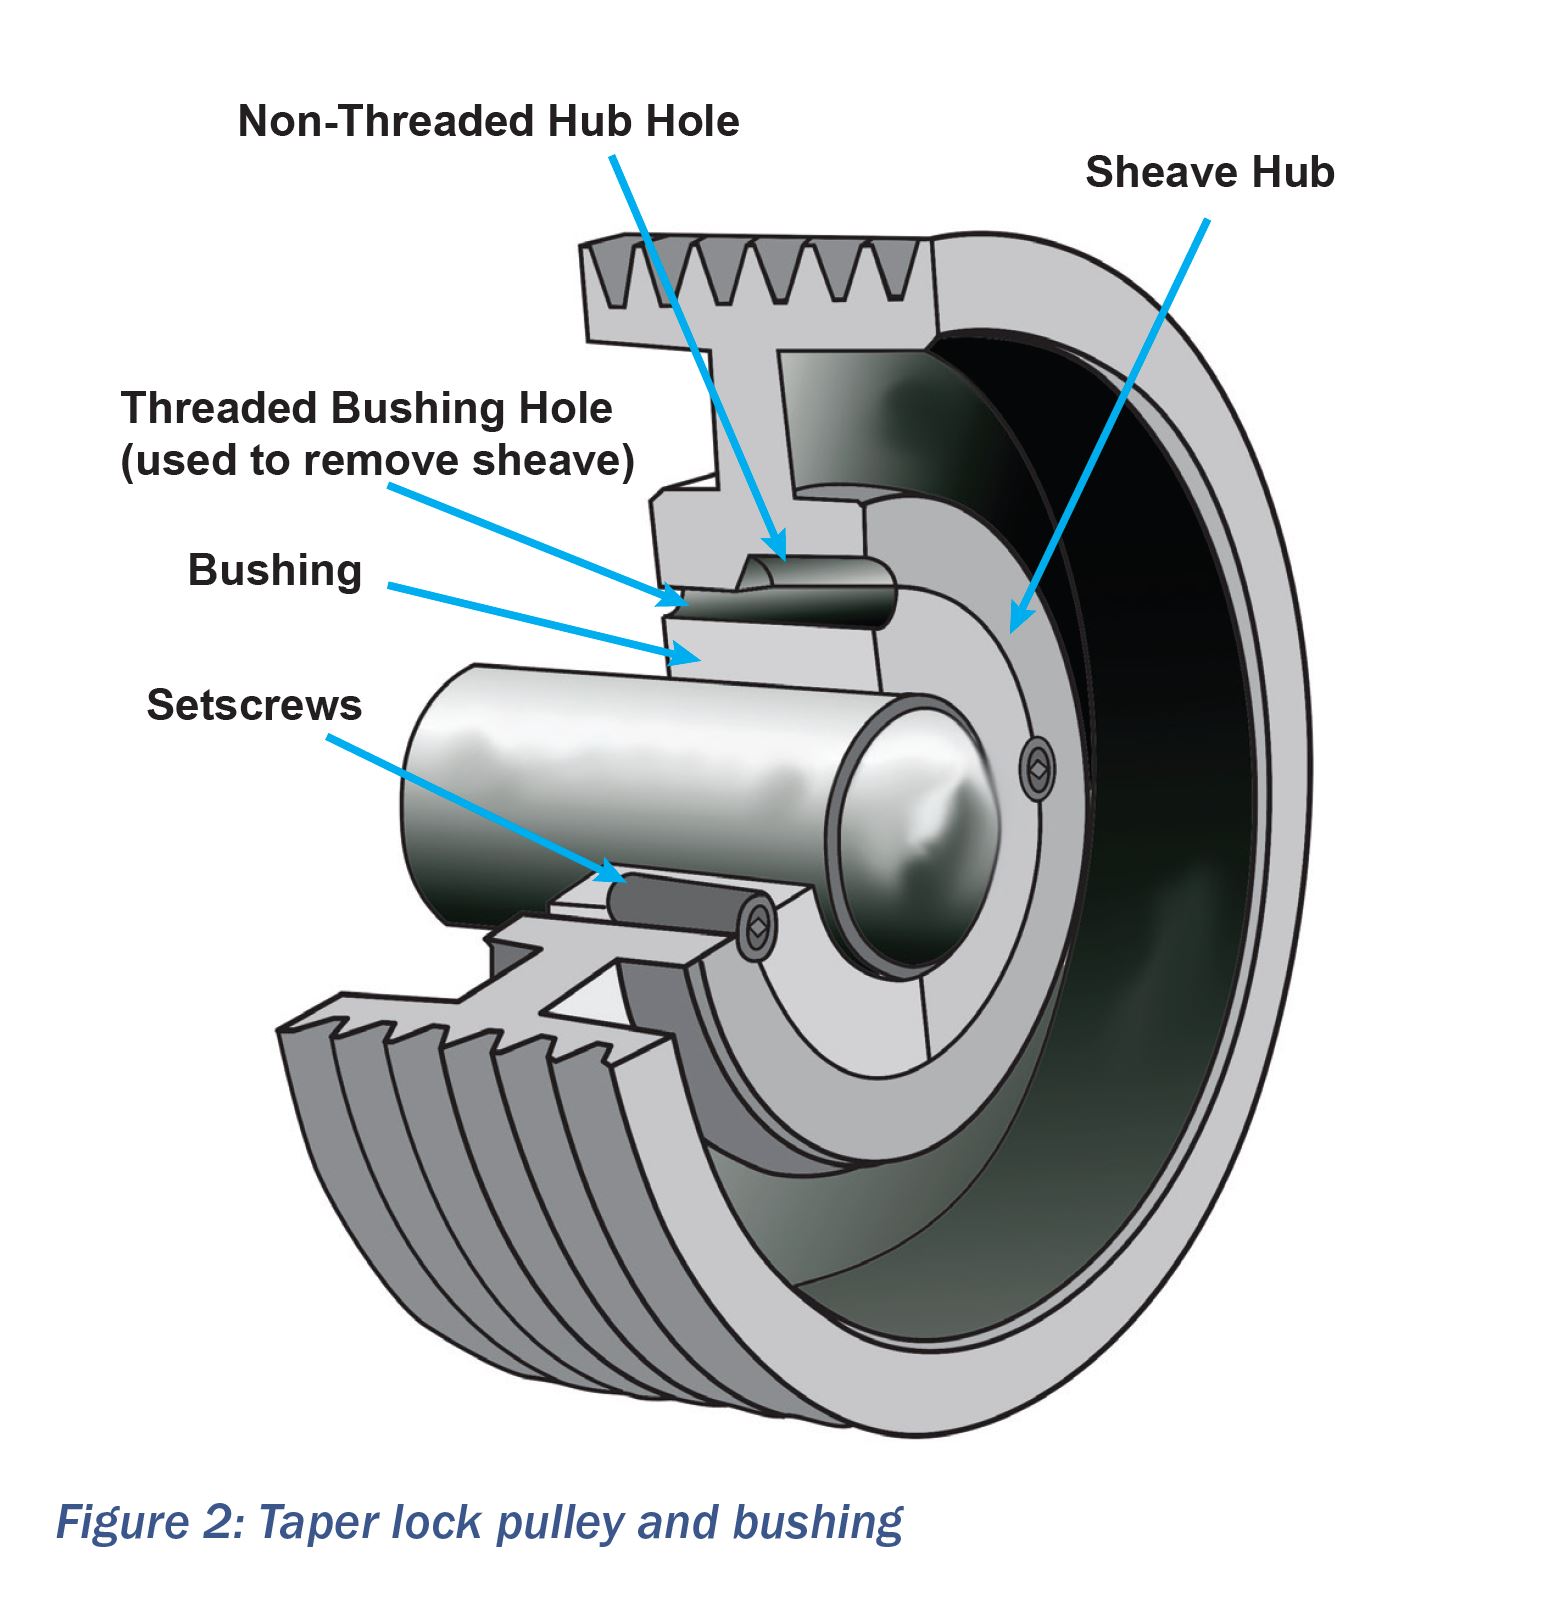
The below instructions are a step by step guide for taper lock pulley installation and removal. It is important to properly install the pulley as it affects all other components within the drive. Improper installation and removal of a taper lock pulley can lead to increased runout and breakage of mating components and the shaft the pulley engages.
Taper lock pulleys are a type of pulley that features a conical shaped bushing that fits into a matching tapered bore in the pulley. The specific design with the taper lock bush allows for a secure fit and easy installation/removal, offering advantages over traditional pulleys. Taper lock pulleys are known for their robust construction and ability to handle high torque, making them ideal for demanding industrial applications.
Taper lock pulleys provide superior performance with minimal maintenance. Their secure fit reduces vibration and wear, extending the lifespan of machinery and reducing maintenance costs.
TAPER LOCK pulley Preparation:
Clean the shaft, bushing bore, bushing barrel and the pulley hub bore of all oil, paint and dirt. Remove any burrs with a file or emery cloth. Note: Lubricants are not to be applied to bushings or pulleys.
Step by step instructions FOR TAPER LOCK PULLEY INSTALLATION:
- Look at the bushing and the hub (figure 2.) and note that each has a set of half holes. The threaded holes in the hub are the mates to the non-threaded holes in the bushing.
- Insert the bushing in the hub and slide it onto the shaft.
- Align a threaded hub hole with non-threaded bushing hole.
- Start the setscrews into the holes that are threaded in the hub only. Do not tighten the setscrews yet.
- Align both edges of the pulley with the edges of its mating pulley.
- Tighten the screws alternately and evenly. This procedure will wedge the bushing inward and cause it to contract evenly and grip the shaft.

Step by step instruction for taper lock pulley REMOVAL:
- Remove all the set screws.
- Place two of the set screws in the holes that are threaded in the bushing only.
- Turn the setscrews alternately and evenly. This movement will unlock the grip and permit easy removal of the assembly with no shock to the bearings or machinery.
References:
Installing and removing pulleys. EASA Currents October 2024. For more information about EASA please click here.